 |
| The new composite 3/4 inch sink outlet |
With the boat safely out of the water this was meant to be straightforward.
For the sink outlet it generally was, the only real problem for the guy doing it was fairly tight access, I had removed the access door to the compartment which is restricted in its movement by the cooker and the heater outlet which proved sufficient.
He removed the old fitting, tidied up the hole and took back the antifouling etc on the outside of the hull and smoothed it flat before fitting the new skin fitting and seacock.
Note that there is no pigment in the glass fibre, Chris Butler the designer believed that not using any below the waterline helped prevent
Osmosis, which is unheard of in his boats, at least those used in salt water and not flooded with fresh.
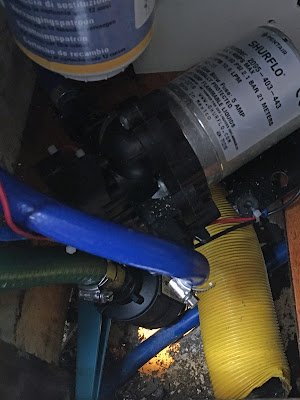 |
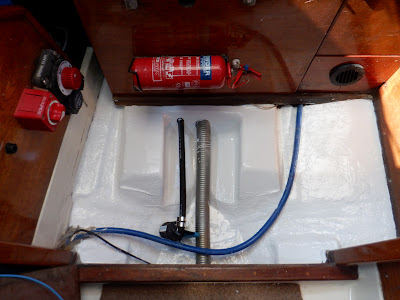
The new seacock lower left, fresh water pump
top right, fresh water filter top left and the
disconnected warm air duct. |
The problem was with the failed engine water intake.
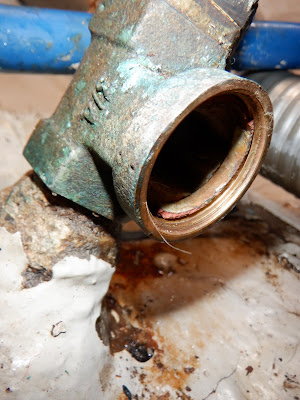 |
Note the mound of glass fibre around the skin
fitting which is holding the fitting in place. |
When the old fitting and the build up of glass fibre around the skin fitting was removed it was found that the hole through the hull was way oversized.
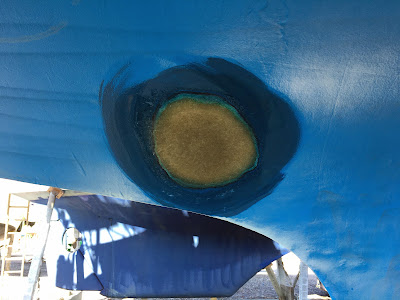
 |
The oversized hole, > 1.5" for the engine water inlet .
The Seacock was 3/4" BSP with a reducing elbow to 1/2". |
It is not clear why or when this was done, the skin fitting appears to have been recessed and had been modified with an integral mesh strainer partially removed (apart from the large external fitting there is a stand alone strainer near the engine which has not had anything in it since I have had the boat). The skin fitting was held in by the internal fibreglass "mound" and just rested on filler in and around the hull aperture.
To fit a new seacock the hull has had to be "re-laminated", not a simple process and was a days work by the yard - NOT cheap!! 😞
 |
The hole cleaned up and the hull progressively taken back ready
for multiple layers of glass fibre matting to be applied over the
plugged hole |
 |
| The glass fibre applied before application of a surface filler. |
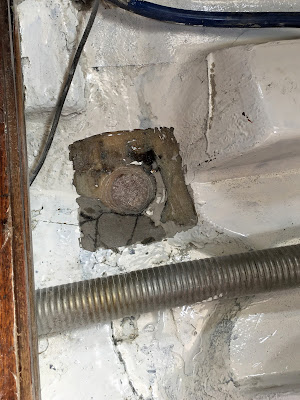 |
Inside almost ready for laminating with
glass fibre & epoxy. |
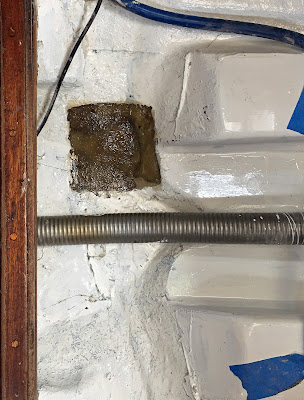 |
| Re-lamination almost complete. |
Fitting the new seacock should now be straightforward. The only problem (hopefully) is that the yard did not have a 1/2" (outlet) seacock in stock and it did not get delivered when expected. Hopefully that will not be long delayed. When fitted I need to treat all of the exposed fibre glass with waterproof primer (International Primocon) then apply multiple layers of anti-foul on the outside and some bilge paint (International Danboline) on the inside then refit the strainer and hoses.
 |
It took a while and I am still missing the compact butterfly handle
but it was finished on Wednesday 20th, just before re-launch. |
Unfortunately, this was not an end to my problems as explained in my post "
I really, really did not want to do this".


No comments:
Post a Comment